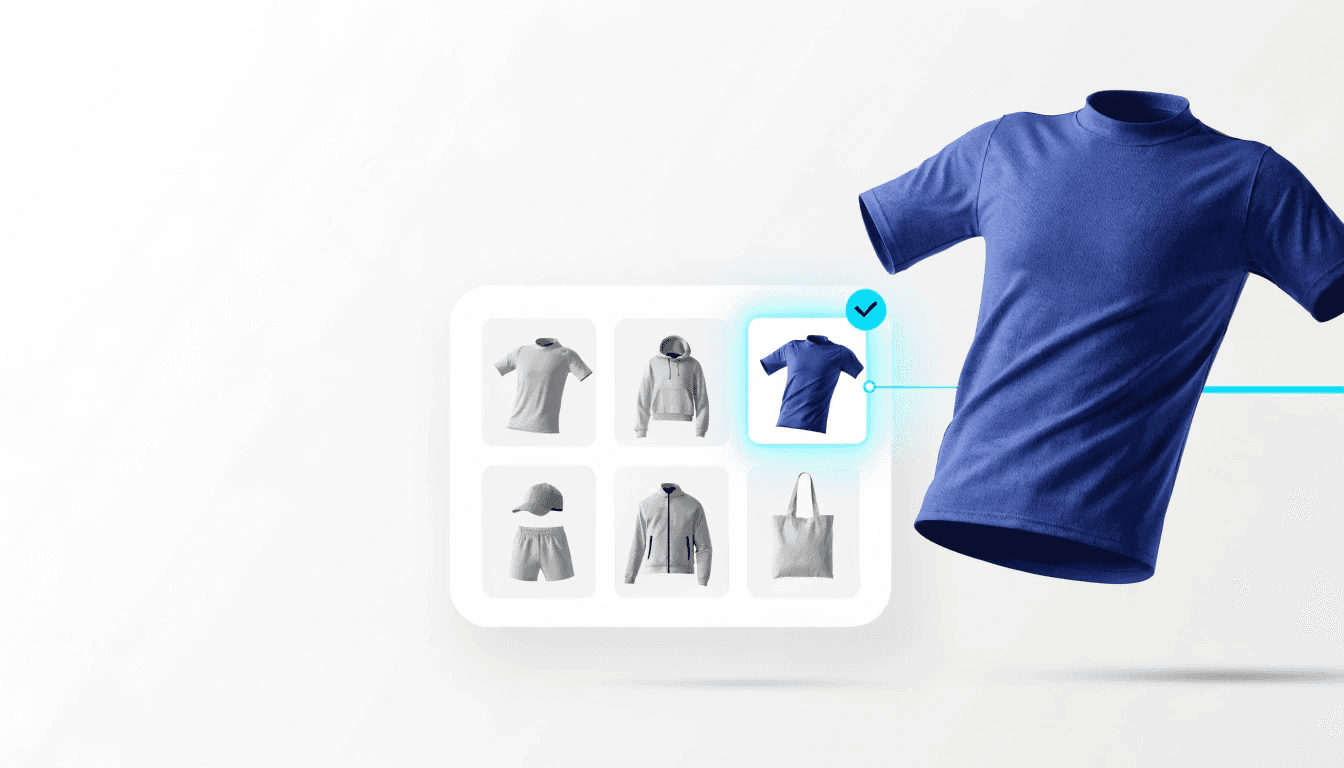
logo

Product Setup

Before uploading a 3D product model to the KONFIWEAR platform, it needs to be properly prepared in Blender to ensure compatibility with the app configuration, UV mapping, and transformations. This guide provides step-by-step instructions on how to format your FBX model, correctly align its UVs, and export it as a compressed GLB file for optimal performance.

For visual guidance, you can also follow our Video Tutorial.


1️⃣ Importing the 3D Model into Blender

The first step in preparing a model for KONFIWEAR is importing it into Blender:

  1. Open Blender and navigate to File > Import > FBX.
  2. Select your FBX model and import it into the workspace.
  3. Verify that all parts of the model have the same UV name.
    • If UV names differ, merging them will cause misalignment.
    • Rename all UVs to "main" for consistency.
    • You can check UV names in the UV Editing Section.

📌 Screenshot: import-fbx-check-uv.png


2️⃣ UV Mapping & Scaling

Once the UV names are consistent, you can proceed with mapping:

  1. Locate the Illustrator file and PNG reference in the provided folder.
  2. Open the UV Editing Section.
  3. Scale the pattern correctly by selecting all model parts at once.
  4. Change the pivot point to 2D to ensure transformations stay uniform.
  5. Align the back section inside the red box (which defines the design limits).
  6. Move the front part inside the red box and ensure it is centered.

📌 Screenshot: uv-mapping-scale-alignment.png


3️⃣ Material Assignment & Alignment Check

To verify alignment, apply the reference texture to the mesh:

  1. Switch to Object Mode.
  2. Delete any existing materials.
  3. Create a new material and assign the reference texture.
  4. Check for misalignment.
  5. Once the front and back are properly positioned, proceed to the sleeves.

📌 Screenshot: material-alignment-check.png


4️⃣ Positioning Sleeves & Collar

  1. Identify the left & right sleeves.
  2. Select one sleeve and activate Use Sync (to reflect the selection in the viewer).
  3. Place the sleeves in the correct sleeve section.
  4. Adjust the collar and place it inside the yellow box at the top.
  5. If the collar doesn’t fit, slightly scale it while keeping it aligned.

📌 Screenshot: sleeve-collar-positioning.png


5️⃣ Separating Parts & Naming Convention

To ensure the app recognizes each section properly, parts must be correctly named:

  1. Separate the collar from the main shirt:
    • Select the collar mesh.
    • Go to Mesh > Separate > By Selection.
  2. If necessary, separate additional parts like hems or cuffs.
  3. Assign correct names to all model sections:
    • Shirt → shirt
    • Collar → collar
    • Interior Parts → interior (if applicable)

📌 Screenshot: correct-naming-structure.png


6️⃣ Scaling & Transformations

Now, adjust the scale and transformation values:

  1. Import the GLB reference file from the provided folder.
  2. Select all model parts.
  3. Scale the model to match the reference size & position.
  4. Verify alignment from all angles.
  5. Once correct, delete the reference model.

📌 Screenshot: scaling-model-alignment.png


7️⃣ Finalizing & Exporting the Model

Before exporting the GLB file, perform final cleanup and optimization:

  1. Separate the interior section (if the model has separate interior & exterior parts):

    • Select interior parts.
    • Go to Mesh > Separate > By Selection.
  2. Remove all attached materials from the mesh.

  3. Parent all model parts (collar, interior) to the shirt.

  4. Ensure transformations are correct:

    • Scale: 1, 1, 1
    • Rotation: 0, 0, 0
    • Location: (0, 0, 0)

    To apply these settings:

    • Go to Object > Apply > All Transforms.

📌 Screenshot: apply-transforms.png


8️⃣ Cleaning Up & Exporting the GLB Model

To prepare the final GLB export:

  1. Go to File > Clean Up.
  2. Delete unused data and remove any extra meshes.
  3. Save the Blender file with the correct name.
  4. Export the model as a GLB file.
  5. In the Export Settings:
    • ✅ Disable Animations, Shape Keys, and Skinning.
    • ✅ Enable Compression (to optimize file size & load speed).

📌 Screenshot: glb-export-settings.png


✅ Summary & Next Steps

  • ✔️ Import your FBX model and check UV mapping.
  • ✔️ Align the front, back, sleeves, and collar correctly.
  • ✔️ Assign proper material & texture mapping.
  • ✔️ Separate necessary parts (e.g., collar, interior) and apply correct naming.
  • ✔️ Adjust scaling & transformations using a GLB reference model.
  • ✔️ Perform final cleanup and export the model as GLB.

🚀 Next Step: Upload your finalized GLB model to the KONFIWEAR platform and start designing!


📖 Additional Resources


📩 Need Help?

If you experience issues with UV alignment, transformations, or GLB exports, contact our support team for assistance.